With some imagination, "spit and whole lot of duct tape" - this small guy may be of great help to get your photographs to be more interesting.
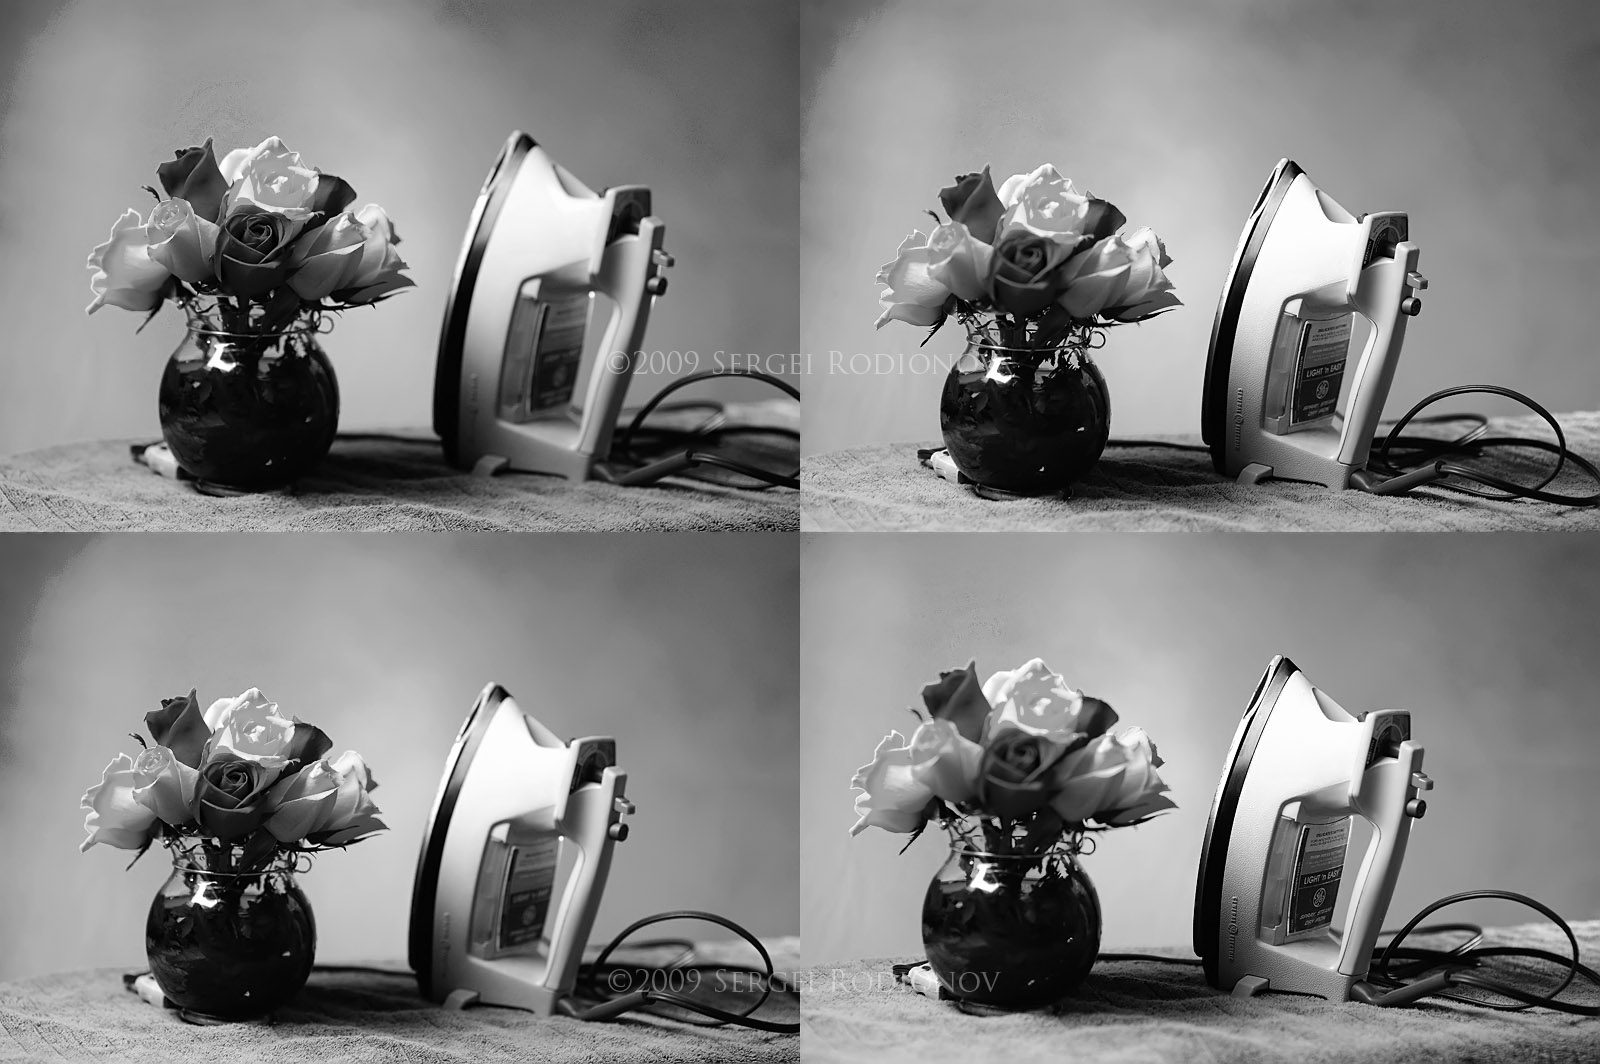
 First of all - lets see straight example - shooting with built-in flash, straight on, no thinking involved.
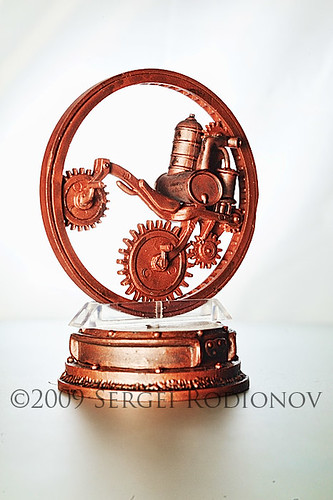
In this case, when we shot small objects, unlike when we try to shoot portraite - built-in flash actually already looks not all that bad. Specially if we tilt camera into "portrait" position - flash would come from side and thus shifts shadows to the side, creating wee bit of depth.
However, to improve situation, and in order to experiment - lets try to create small light diffuser/modifer from sheet of white foam. Cut hole in it, so you can get your lens through (if possible - not much wider), and so sheet would stick out about 10 inches from highers point of your built-in flash , when its "popped up". In a pinch - you can use simple list of A4 office paper. It just will be far less reusable than foam.
So once we got this thing on our camera, we have new secondary light source, that is created by built-in flash hitting surface of our sheet. This light source woul have bigger size, therefore - light will be far more soft.
(also it will eat some of flash power. In my case it ate 2 stops).
 Now, shooting with our new contraption, we getting less of harsh shadows on object, and virtually no shadow on background.
However - light still spills on background too much and yet - not enough. Too much - so we see background (its hard not to - built in flash , after all, shoots light on almost same axis as lens), and not enough - because our white background retains too much wrinky details, and looks grayish.
Of course we could get rid of wrinkles by using paper rolls, white or gray or black or whatever colour we feel like.
But if we have at least one flashgun - we dont really need to. And also - we could add more depth feeling with another light source, as oppose to just built-in flash.
Lets assume that we have flashgun that could be optically synchronized (i.e optical slave - either built-in or aftermarket is on that flashgun).
 Let us point it to the background, same as before.
In general getting white backgrounds in pictures are dead simple - all you really need to do is to have light source hitting background , and if they are about 2 stops more powerful than main light - you will get yourself decent white background that so liked by ministock photography.
However lets be a bit more sneaky, and put wee grid on the background flash, angling it slightly upwards, to create lighter diagonal in this shot.
One more thing, by the way. If your flashgun is one of those old ones, or really cheap ones that wont have enough power adjustment levels - remember, that for background light you dont really care about how hard or soft light is - so you can use distance as extra level of adjustment. Adding 40% of distance will roughly decrease power output by stop, and decreasing distance by roughly 40% will gain you one stop of power.
 Now, if we are not shooting stock, and looking for something more dramatic, we can use black background. Then we can use flashgun to create bright spot behind object, that will create nice backround separation.
Both ways (albeit its more apparent with dark background) shows that even using single flashgun + built-in flash we may get some quite decent sense of depth and add some variety to shots.
Of course, if we add another flashgun we could throw some rim light on object to define edges even better, so there is always place for improvement.
Important note: for this kind of shots, even if you have remote TTL capabilities with your flashgun and built-in flash (like with Olympus or Nikon) - it is far easier to achieve decent results using both flashes in M mode, than in TTL. Reason why TTL is more complex for artsy shots, is because you have no control over power outputs and decisions of system are unknown to you. At best you can maintain power ratio, but its only 3 steps of gradation, whereas in this case it had to be more.